Start With a Full Cleanout
Before buying a single bin or hook, empty the garage completely. Pull everything onto the driveway so you can see exactly what you have. This step feels disruptive, but it's the only honest way to assess what's worth keeping - and what's been taking up floor space for years.
Sort items into four groups: keep, donate or sell, trash, and not sure. Be realistic with the last group - if something has sat untouched for more than two years and serves no clear purpose, it's likely clutter. For hazardous materials like old paint, motor oil, or pesticides, check your municipality's guidelines for proper disposal rather than simply tossing them in the trash.
Once you've decided what stays, group similar items together on the driveway. This preview of categories - tools, lawn equipment, sports gear, holiday decorations - will directly inform your zone plan in the next step. See our room-by-room organization checklist for a broader audit approach you can apply throughout your home.
Sort Before You Shop
Resist the urge to buy storage supplies before you've finished sorting. It's easy to overbuy bins that don't fit your actual items or underestimate how much shelving you need. Complete the cleanout and category grouping first, then measure and shop with a specific list.
Define Your Zones
Zoning is the backbone of a functional garage. Rather than storing things wherever they fit, assign areas of the garage to specific activity categories. Common zones for American households include: hand tools and hardware, lawn and garden equipment, automotive supplies, sports and recreational gear, and seasonal or holiday storage.
Place zones according to frequency of use. Items you reach for weekly - like a lawnmower, recycling bins, or a toolbox - should sit near the garage door or in easily accessible spots. Rarely used items like holiday decorations or camping gear belong in upper shelving or the back corners. If your garage also serves as a workshop, keep that area near an outlet and a window for ventilation and natural light.
If you're unfamiliar with terminology like "dead space" or "zone storage," the storage terms reference guide can help you plan with confidence. Understanding how space is typically categorized makes it easier to talk to contractors or evaluate shelving systems.
When setting up zones, tape out the boundaries on the floor with painter's tape before committing to shelving or hooks. Living with the layout for a week reveals problems you won't see on paper.
Many organizers jump to hardware installation before testing workflow. A temporary floor map costs nothing and often surfaces issues - like a zone blocking the car door - before they become permanent.
Color-code your storage bins by zone using colored labels or lids. When someone grabs a sports item and wanders toward the tool wall, the wrong color signals immediately that it belongs elsewhere.
Visual cues reduce the cognitive load of maintenance. Households with multiple people using the same space benefit especially because the system communicates without requiring verbal reminders.
Make the Most of Vertical Space
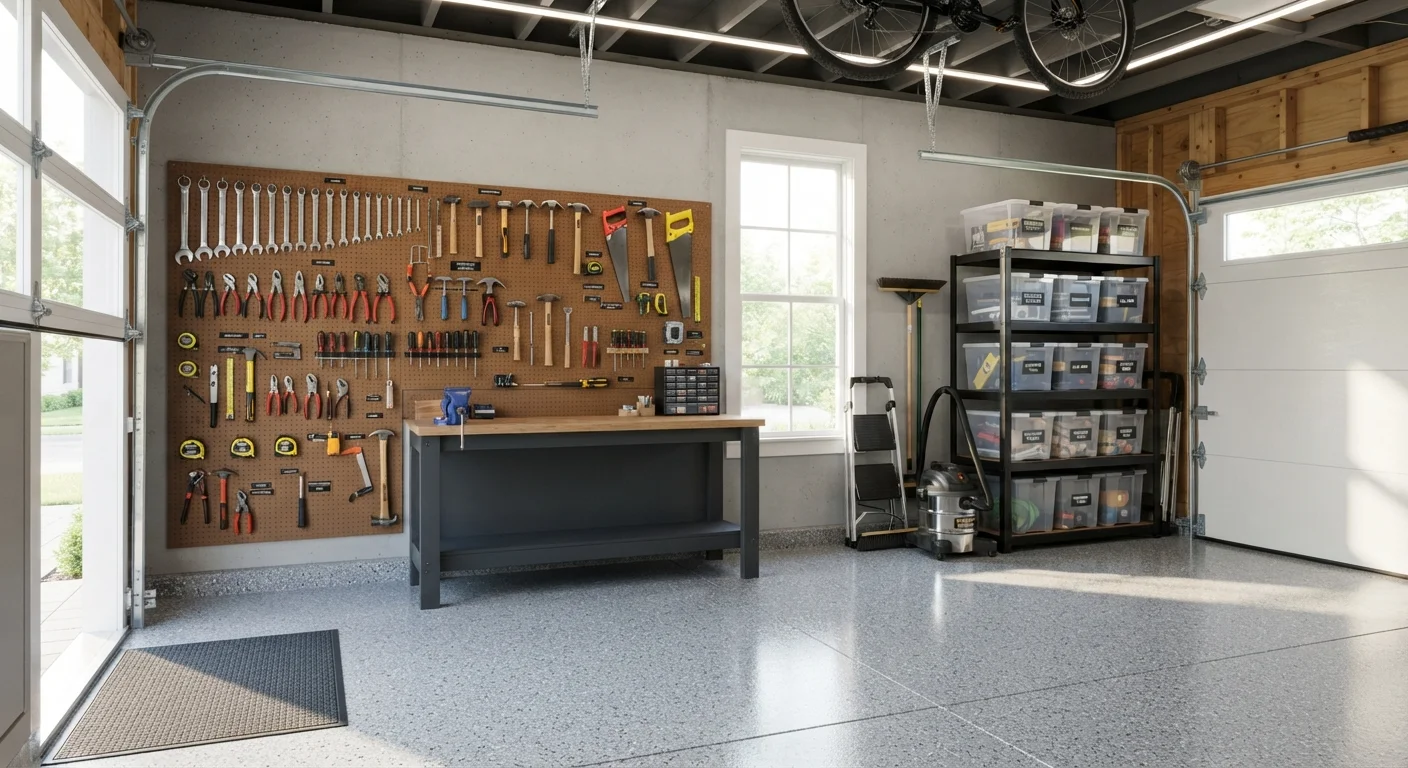
Most garages have eight to ten feet of wall height - and most of that height goes completely unused. Claiming vertical space is one of the highest-impact changes you can make without expanding the footprint of the garage.
Consider these vertical options:
- Pegboards: Ideal for hand tools. Hooks are repositionable, so the layout can evolve as your tool collection grows. Mount pegboard at eye level for the most-used tools.
- Wall-mounted shelving: Heavy-duty brackets and plywood or wire shelving units hold bins, paint cans, and small appliances. Space shelves to accommodate your tallest containers.
- Overhead ceiling storage: Platform-style ceiling racks work well for bulky, lightweight items - think plastic storage totes with seasonal decorations or camping gear. Make sure the rack is rated for the weight you intend to store and that it's anchored into ceiling joists, not just drywall.
- Slatwall panels: A modular system that accepts a variety of hooks, bins, and baskets. More flexible than pegboard and visually clean.
Leave floor space clear wherever possible. A clear floor not only looks better - it makes sweeping, moving vehicles, and retrieving items far more practical. For ideas on tapping hidden storage potential throughout your home, see Hidden Storage Opportunities Most Homes Already Have.
25%
Homeowners who can't fit a car in their garage
According to a U.S. Department of Energy study, roughly one in four homes with a garage cannot use it for vehicle storage due to clutter.
8-10 ft
Typical garage wall height available for storage
Standard residential garages offer substantial vertical space that most households leave entirely unused above the five-foot mark.
Seasonal Storage Strategy
The garage often becomes a catch-all for seasonal items - holiday lights, snow blowers, pool floats, gardening tools - because those things don't belong inside the house but need to be accessible at predictable times of year. A rotation plan prevents this from becoming a permanent tangle.
Dedicate a consistent area, usually upper shelving or ceiling racks, to off-season items. Store them in clearly labeled, stackable bins. When summer ends and outdoor furniture cushions need to come in, those bins move down and the current-season items move up. This rhythm keeps the garage functional year-round rather than chaotic after each holiday.
Lawn and garden tools deserve their own attention. Long-handled tools like rakes, shovels, and brooms are awkward to store flat. A simple wall-mounted rack with rubber clamps holds them vertically, saving floor space and preventing handles from becoming tripping hazards. Visit our Lawn & Garden hub for seasonal maintenance guidance that pairs well with an organized storage setup.
Keeping It Organized Long-Term
Organization isn't a one-time event. The households that maintain a tidy garage share a few consistent habits that make upkeep low-effort rather than a recurring weekend project.
Label everything. Labels remove ambiguity for every household member, not just the person who originally set up the system. Use a label maker or simple masking tape and a marker. Label the bin and, if you have the shelf space, the shelf itself - so items get returned to the right spot even when someone's in a hurry.
Establish a "staging area." A small, defined spot near the garage door for items that need to leave - donations, returns, items going to a neighbor - prevents random objects from drifting back into storage zones.
Schedule a quarterly reset. Set a reminder every three months to spend 20-30 minutes walking through the garage. Return misplaced items, discard empties, and reassess whether zones still make sense. This is far less daunting than an annual overhaul.
If your household shares the garage, common myths about shared-space organization are worth reading - particularly the assumption that everyone needs to agree on a single system before starting. Starting with a clear, simple framework and refining it together over time is often more effective.
For homeowners tackling organization one room at a time, this garage walkthrough pairs naturally with the Home Improvement hub, where you'll find guidance on repairs and upgrades that support a well-functioning home.